Lullabies and Lippies

Make-Up Junkie Turned Mommy

  • Home
  • Beauty Babbles
  • Lifestyle
  • Love and Marriage
  • Mommy Diaries
With date make-up, you can go either of two ways: fresh and au naturel or striking and sultry. Whichever you choose, I've got you covered! Follow these simple steps for an easy, make-up look that's perfect for some 1-on-1 time with your special someone, a get-together with your best girlfriends, or even just some alone time to recharge and relax

Fresh and Au Naturel
Key elements: Even, glowy skin, natural brows, fluttery lashes, rosy flush
  1. Blend a light-to-medium coverage foundation or BB cream on to your face; set with powder as needed.
  2. Shape your brows and fill them in naturally with your brow product of choice (Tip: Go with a brow pencil for a more natural look. Your brow pencil should 1-2 shades lighter than your hair color)
  3. Curl your lashes and apply a coat or two of your favorite mascara (Tip: A waterproof formula holds up a curl better while ensuring a smudge-proof, worry-free wear)
  4. Swipe on a peachy-pink lipstick on your lips and double this up as a cream blush. Use your fingers to blend out the product on your cheeks for a natural, dewy finish.
  5. Apply a subtle highlight on to your cheekbones. (Tip: Skip this step if you have naturally oily skin)
L-R: Ofra Peach Lipstick, Burt's Bees BB Cream, NYX Brow Pencil (all available on ZALORA PH)

Striking and Sultry
Key elements: Perfected skin, chiseled face, structured brows, defined eyes, bold lip

  1. Blend a medium-to-full coverage foundation on to your face and apply concealer in areas where extra coverage is desired. Set with powder as needed.
  2. Contour your face: below the cheekbones, around the temples and jawline, and down the bridge of your nose.
  3. Shape your brows and fill them in with your brow product of choice. Since we will be going bold on the lip, fill your brows in a little heavier than you normally would.
  4. Line your eyes, curl your lashes, and apply two coats of a volumizing mascara. (Tip: Tightlining your waterline instead of lining your eyes is a great alternative for those who prefer a more subtle effect)
  5. Apply your favorite bold lip color. Red is a classic, and is guaranteed to go with any outfit you choose! (Tip: To mattify your lipstick and make it smudge-proof, blot your lips on to a tissue and dab some loose powder on to them.)
L-R: L'Oreal Color Riche Lipstick, Max Factor Face Finity Foundation, banila co. mascara (all available on ZALORA PH)
Which makeup look are you going for this V-day? Share your thoughts in the Comments section below!

Disclaimer: This is a re-post. My original post is published on Zalora PH Community. All images used in this entry are from the original. (View post here)
Share
Tweet
Pin
Share
No comments
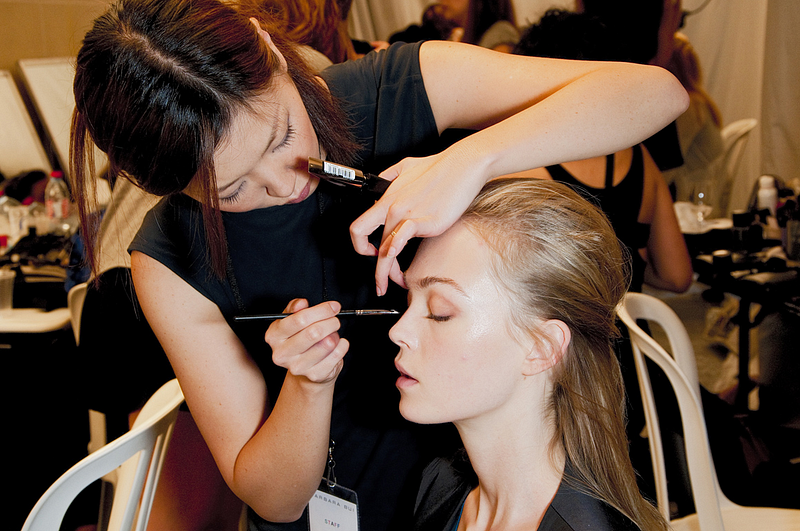
From warm eye shadow tones to a subtly defined face, here are the beauty trends that are taking shape in 2017.


FACE: Subtly Defined
Say goodbye to harsh contouring and hello to subtle dimension. Using a fluffy brush, sweep bronzer or contour powder across your hairline and temples. The thing to remember is that you don’t need to be too precise in application as you’re going for a softer, less chiseled look.

To take things up a notch, apply highlighter on the top of your cheekbones, down the bridge of your nose and on your cupid’s bow to achieve that naturally-dewy look.

BROWS: Naturally Filled and Slightly Tamed


Things got a little crazy in the brows department last 2016 when overly-structured eyebrows took the beauty world by storm.

While this may look good in print ads and editorials, it’s not exactly the most natural-looking. On a softer note, we’re seeing more natural looking brows this 2017. Naturally filled-in, and slightly untamed, there’s just so much to love about this year’s brow trend.

Another thing to love about it is that it takes way less time achieve. Simply fill in your brows with brow powder and comb through with clear brow gel. To further cut down on prep time, opt for tinted brow gel so you can tint and set your brows in a single glide.

HAIR: Messy and Lived-In
Think Victoria’s Secret Angels — To achieve this look, use a curling iron to add soft waves to your hair. For further volume and that lived-in look, apply dry shampoo or sea salt spray on to your roots, flip hair over and shake out.

LASHES: Separated and Slightly Clumpy
Separated (and slightly clumpy) lashes reminiscent to that of Twiggy’s were seen all over 2016 Fashion Week. If the idea of clumping on mascara freaks you out a bit, you can still cop this look with some falsies, particularly on the bottom lashes!

LIDS: Warm and Inviting


Orange, red, copper and other warm shades are having a bit of a moment. This trend started around fall last year and it looks like it’s here to stay. Lucky for us Asians as this color palette looks amazing on our skin.

Which of these beauty trends are you trying for the new year? Would love to hear your thoughts in the Comments section below!


Disclaimer: This is a re-post. My original post is published on Zalora PH Community. All images used in this entry are from the original. (View post here)
Share
Tweet
Pin
Share
No comments

I was born with naturally and permanently fleshy (read: chubby) cheeks. I say permanently because it doesn't matter if I've lost any weight - my face remains as chubby as ever! Not complaining, though. Have learned to embrace and love this about my face since I think it makes me look at least a few years younger - and I'll take any pass I can to shed a few years off!

Once in a while though, I do like to subtly contour my face to add some subtle dimension. For events, I go a bit heavier on the contour so that my face comes out more chiseled and defined in photos. Lately, my favorite product to contour with has been this Contour Kit by Sleek MakeUP. I have it in the shade Light.


It comes with in a sleek (hehe), black compact that contains the contour powder and a highlighter to go with it.


I especially like the contour powder in this kit because it's not too cool, nor too warm. Too cool contour powders can look grayish or muddy, while too warm powders can look orange and sunburn-like. It's quite difficult to come across a product such as this that is the perfect shade.


I would describe the formula of the contour powder to be a satin. In the pan, it certainly looks matte, and there is no detectable shimmer in the product, but when you put it on with a brush, it looks as if there is a very subtle, natural sheen to it, just enough to make it not look completely flat.


Pigmentation of the product is also very good. For a subtle, everyday contour, dipping my brush in once is enough to do one side of my face. Formula is buildable, though, so I do go in with more product if say, I'm going out at night or will be taking a lot of flash photography.

This contour kit also comes with a nice, champagne highlight powder. To be honest though, I don't use it all that often only because I have a lot of other highlighters which I like a lot more (read about them here) I don't have any complaints about it though. It's certainly a nice, champagne shade, and although this does contain some shimmer in it, the formula is so finely-milled that I don't find it to settle in my pores or facial lines. This kit would certainly be nice to travel with since you won't have to take two separate products anymore. The compact also comes with a good mirror for on-the-go application!

Retail price for this kit at malls is PHP575. Not bad for a quality 2-in-1 product.

Have you tried this? What are your favorite products to contour or highlight with? Would love to hear about them!


Share
Tweet
Pin
Share
No comments

I recently did a major make-up collection declutter prior to moving out of my old home and into my new one with my hubby and his family. It was the perfect opportunity for a declutter because: a.) I really had waaaayyy too much make-up already, more than I'll ever need in this lifetime, or the next, b.) I wanted to have a smaller collection of products that I truly love and use, rather than a bajillion of something that I hardly reach for, and c.) I really don't like packing and unpacking things.


... Aaaaand since I had gotten rid of more than half my collection, I thought it would be okay for me to purchase one, new lipstick. Just a teeny, tiny baby single one. (Oh please don't let this turn into a vicious cycle..) For my one, new lipstick purchase, I wanted a color that I could wear everyday either with a full face of make-up on or even with minimal product - I chose MAC Mehr.


MAC Mehr is described as a dirty, blue pink. Despite leaning more on the cooler side, this shade can be easily pulled off even by those with warmer skin tones. I normally can't pull off pinks that are even the slightest bit cool-toned, so I was pleasantly surprised to find that this works as a nice, everyday shade for me.


One swipe only
One search on Google will tell you that this shade is one of MAC's best-selling ones, and I can totally see why. It's neutral enough to wear with a smokey eye, yet is the perfect shade for even just a face powder-brows-mascara-blush kind of day. It adds just the right amount of color to bring life to your face and make you look polished! I can see this working for a wide range of skin tones, too.

Another thing I love about this is that you can go really light with this by just dabbing the lipstick on to your lips, or you could go full-on Kylie Jenner and wear this over a deeper lip liner with mauve/brown undertones.

This shade comes in a matte formula, so I make sure to exfoliate my lips first to get rid of any flakiness prior to application. Another thing I noticed is that this lipstick can accentuate lip lines if applied too heavily, so be careful not to go overboard with this one! Staying power is approximately five hours with light snacking and drinking in between. Eating a full meal or something oily though, will require me to touch up.

MAC Mehr has become a permanent fixture in my handbag. I might even go as far as saying I have finally found my holy grail MLBB lip shade. (I never thought this day would come!) Definitely a keeper in my books. If you ever have the chance or you're in the market for a new lipstick, I really hope you give this one a whirl!

MAC Mehr on my lips

Share
Tweet
Pin
Share
No comments

Since I have normal to combination skin, I've always been slightly terrified of highlighters for fear of looking like a greaseball. Lately though, I've learned the secrets of subtle highlighting to get that glow-from-within we're all (well, at least I'm) after! Not a fan of the intense highlighting we see all over Instagram (and I mean the one that looks like a big stripe of flash!) - I think it looks unnatural and just too much for day-to-day. Just my two cents, whichever makes you happy though! ;)

Finding the right shade
In finding the perfect, subtle, everyday highlighter, I think the most important thing is to find the shade that's perfect for your skin tone. Not really much to say here, except that you have to try them on your face to really see how it will look on you. Swatching on your arm will not be the most accurate - trust me, a few of my favorite highlighters (that I will be sharing with you below) look completely different swatched on my arm and applied on my face. I have light medium skin with warm undertones, so I find that highlighters with a golden undertone work best for me. If you have cool undertones, try highlighters with a pearly or pinker undertone.

Texture is key
In order for your highlight to look truly skin-like, you want a very fine, satin texture in your highlighters. Big chunks of glitter are definitely out of the question. My two favorite highlighters (listed as #1 and #2 below) look almost matte in the pan, but on top of my cheeks, they give the most natural, satin, skin-like glow!

Use the right tools
What tools you should use really depends on the kind of effect you're after. If you want a more intense highlight, use a fluffy, but dense brush. I prefer a light wash for everyday, so I love using a fan brush for my powder highlighters. It deposits a small amount of product with each swipe, so you can slowly build up the product until you get your desired intensity. For liquid or cream highlighter though, I love using my fingers to apply. I find the warmth from my fingers helps to melt the product on to my skin for a more seamless finish.

Also, remember that when it comes to highlighting, less is definitely more. You want to look dewy and fresh, not glittery, and definitely not oily.

Here are some of my favorite highlighters of LIFE!


1. Laura Mercier Matte Radiance Baked Powder in Highlight-01


If you're a make-up junkie, then you've probably heard of the million and one praises this has gotten from the online beauty community since its release. Even make-up artists swear by this, and I can totally understand why! In the pan, it looks almost just like a face powder. When I swatched it on my arm, I was like meh, this may not even show up at all on me! I was so glad the sales associate at the Laura Mercier counter insisted to apply it with a brush on my face because OMG I was blown away! It gave me the most natural, skin-like glow. I even looked at myself up close in the mirror to check ('cause I'm a skeptic like that) and this did not emphasize my pores whatsoever. The texture is a very finely-milled satin, so it goes on seamlessly on to your skin. I love this stuff. If there's one highlighter I'm going to harass you into purchasing, it's this one! GO GET YOU SOME!

2. Essence Pure Nude Highlighter in 10 Be My Highlight

I think this is a total dupe for the Laura Mercier one I mentioned above because a.) it's also baked, b.) it also looks just like a face powder in the pan, and most importantly, c.) it gives the same effect on the skin. I use this and the Laura Mercier one interchangeably, depending on my mood. Honestly though, if I were to dip my brush into either one of these without looking, and apply it to my face, I would not be able to tell which I was using.

The best part is that this is totally accessible at most major department stores nationwide at less than PHP400 a pop! Love finding drugstore dupes for high-end products!

3. Becca Shimmering Skin Perfector in Opal


I only have one liquid highlighter - this one from Becca. Honestly, I got it because I saw Miss Universe 2015 Pia Wurtzbach use it in her everyday make-up tutorial LOL I don't know what I was expecting from this, though I was pleasantly surprised with the fresh, dewy look it gave me when I applied it with my fingers. The shimmers in this are so fine, they do not come off the least bit gritty on your skin. This is a nice option for those with drier skin types.

4. Becca Shimmering Skin Perfector Pressed in Champagne Pop


For day-to-day, I will choose any of the above three highlighters in this list, but I do have a more intense option for special occasions or say, a night out (who am I kidding, I rarely go out at night.) This one by Becca in shade Champagne Pop is probably the most hyped about highlighter in the online beauty community. Beauty YouTuber Jaclyn Hill (whose highlight is always.on.point!) collaborated with Becca to come out with this particular shade that is said to be universally-flattering. Personally though, because of the golden peachy undertones, I think this suits warmer skin tones more. This is definitely a very pigmented and intense highlighter, so be careful when you're going in with your brush because it's really easy to go overboard with this! I prefer using a fan brush to apply because then, I can slowly build up the intensity.

Have you tried any from the bunch? Let me know your thoughts!

❤,
N
Share
Tweet
Pin
Share
No comments


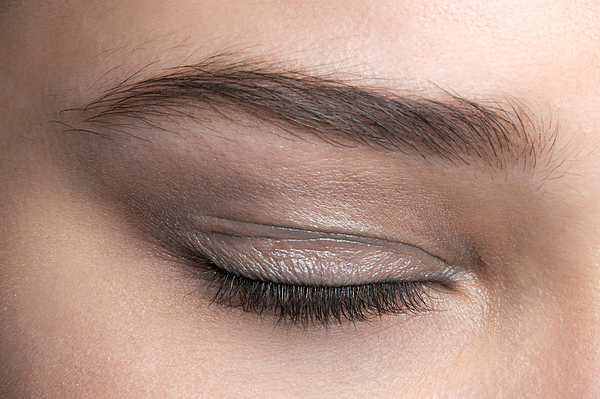
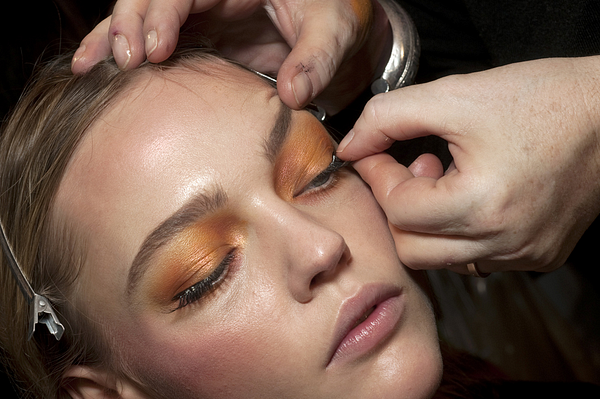
Sure, applying beauty products hardly feels like a chore but when pressed for time, shortcuts are the way to go. Whether you’re jumping from one event to another or just simply cannot be bothered, these beauty hacks are guaranteed to help you look great and save you time, money, and hassle.


1. Mattify any lipstick you have
Matte lips are sophisticated and timeless. Want to rock this look but don't exactly have a matte lipstick? Here’s how: Take your lipstick of choice and apply as you normally would. While waiting for it to set, load up your powder brush with some loose powder. Next, place a sheet of tissue over your lips, and lastly, dab the brush over the tissue. Amazing right? The powder actually absorbs the moisture from the lipstick and automatically turns it matte. I find this hack works best with bright and bold lip colors, making lipstick smudge-proof and ultra longwearing.


2. Re-activate mascara before re-applying
One beauty product I find a bit tricky to re-touch is mascara. If you've got after work plans and want to amp up your mascara ridden lashes, try applying a thin layer of petroleum jelly on to your fingers and pressing it down gently on your lashes. This re-activates the mascara you already have on, smoothening out your lashes and prevents further clumping once you re-apply mascara.


3. Use oil blotters before re-touching
With the humid Manila weather, keeping our faces sweat and oil free can be quite a challenge.  To keep your face looking fresh all throughout the day, keep a pack of oil blotting sheets in your purse and be sure blot before re-touching your makeup (skipping this step only results to cake-y make-up). So oil-blotting sheets are your best bet when it comes to keeping sweat and oil at bay. Don’t have this neat beauty accessory at hand? Paper napkins work just as well.

Got any more beauty hacks in mind? I'd love to hear all about them in the comments down below!

Enjoy the rest of the holidays, guys! Have a Happy New Year celebration! :)

❤,
N

Disclaimer: This is a re-post. My original post is published on Zalora PH Community. All images used in this entry are from the original. (View post here)

Share
Tweet
Pin
Share
No comments
Older Posts

About Me


Hi! I'm Nicole, 20-something, and based in Manila. Allow me to share with you what goes on in my make-up-loving mind. I hope you'll also join me in my new adventures as a wife, and as a first-time mom. ❤

For collaborations, please e-mail me at nicoleyusee@gmail.com

Follow Me

  • Instagram
  • Facebook
  • Zalora PH

Labels

  • beauty
  • lifestyle
  • marriage
  • motherhood
  • online shopping

Blog Archive

  • ►  2012 (6)
    • ►  February (4)
    • ►  March (2)
  • ►  2015 (31)
    • ►  January (16)
    • ►  February (6)
    • ►  March (1)
    • ►  July (2)
    • ►  October (2)
    • ►  November (1)
    • ►  December (3)
  • ►  2016 (2)
    • ►  February (1)
    • ►  July (1)
  • ▼  2017 (12)
    • ►  January (4)
    • ►  February (4)
    • ►  March (1)
    • ►  April (2)
    • ▼  September (1)
      • A Review on EcoMom UV Sterilizer

Created With By BeautyTemplates & Published With By Blogger Templates